


When you purchase an item after clicking a link from this post, we may earn an affiliate commission.
This is the second of three chapters in our series about installing solar on our RV. You can read chapter one here and chapter three here. See video one here and video three here.
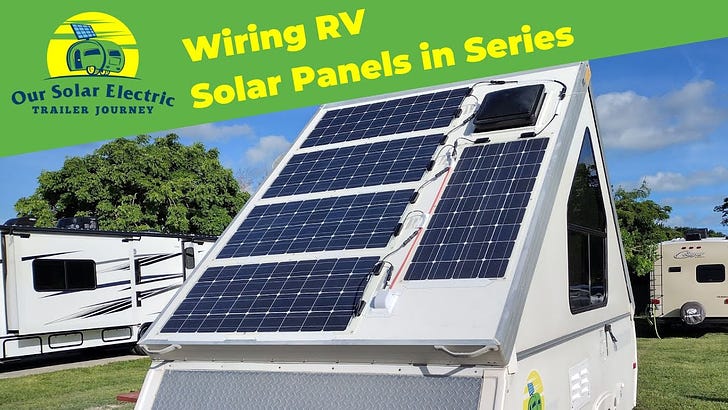
Our work installing the solar panels on our Aliner Scout popup trailer continues. While we aren’t far from being experts, we’re sharing what we did step by step so you can see exactly what we did.
Before you consider copying us, be sure to find alternative examples so you can decide what’s best for your RV.

We decided to wire the solar panels in series. The basic alternative is to wire in parallel. In series, the panels connect one to the next. In parallel, all the negative wires connect in one feed to the system, and all the positive wires do the same. In either case, the wires run through the roof into the RV where they connect to a charge controller that converts the power to charge the battery.
After simply connecting the first four panels one to the next, we found the fifth too far from the fourth to connect. We needed to create an extension. Using a length of the 10 AWG (American Wire Gauge) wire, with a single MC4 connector for assembly.
We start by crimping the little metal connectors onto the wire using a crimper like this one. The black outer female part goes over the little male connector; the black outer male connector goes over the little metal female connector. We disassembled the MC4 connector ends and reassembled them over the little attached connectors.
With that extension cable, we quickly connected the fourth panel to the fifth.
Next, we cut a hole through the roof for the wires. The wires pass through an entry gland that allows for a tidy, water-tight seal over the hole. We slip each wire through all the gland’s components and then tighten them up to seal out the water.
We then attach the gland to the roof using outdoor two-sided tape; then, for good measure, we applied some roof seal tape around the edges.
We’re excited to go camping in our RV with the solar panels working. There’s still more work to do, but we’re getting closer!
Watch for future posts with the rest of our work to complete the solar panel installation.


Share this post